

Has you ever dreamt of being able to leave a conversation with ninja skills?
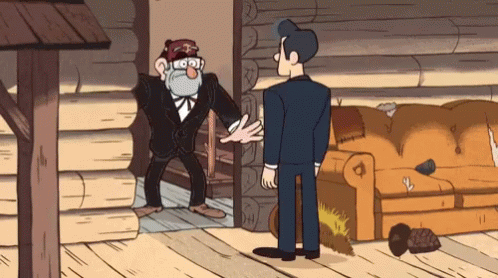
If you work at home and spend time in MS-Teams, Zoom or similar software, you might finally be able to do it... like this:
So, do you want to feel like a ninja? You can either train for 20 years in the mountains... or follow the tutorial below!
Note: this tutorial was made on Windows. All those tools should work or have alternatives for Linux and Apple, but you're on your own to find them!
1. The goal
Here's an overview of what we are going to do:
- Create a virtual camera that Microsoft Teams and Zoom can use instead of your webcam
- Create an animated overlay containing the smoke bomb
- Superimpose the overlay over the feed coming from your webcam
- Experiment with leaving the screen really fast
2. What do we need?
- Free Software OBS Studio
- Free OBS Virtual Cam Plugin
- A video containing the smoke bomb
- A software to cut the video like Shotcut
- A little bit of time to do all this and experiment!
3. Prepare the smoke animation
- I found this royalty free video, from BestGreenScreen, you can use this, or another one, it should work fine as well. Download the video.
- We need to extract exactly the part of the video we need, for this I will use Shotcut. If you have another software installed, feel free to use it instead.
Cut the video with Shotcut:
- Launch Shotcut and open the video file (top left)
- Drag and drop the video from the middle view into in the timeline (below)
- Play the video until you find the point where you want to cut. Press "pause" and then hit the "Split at playhead" icon "][". It will split the video into two segments.
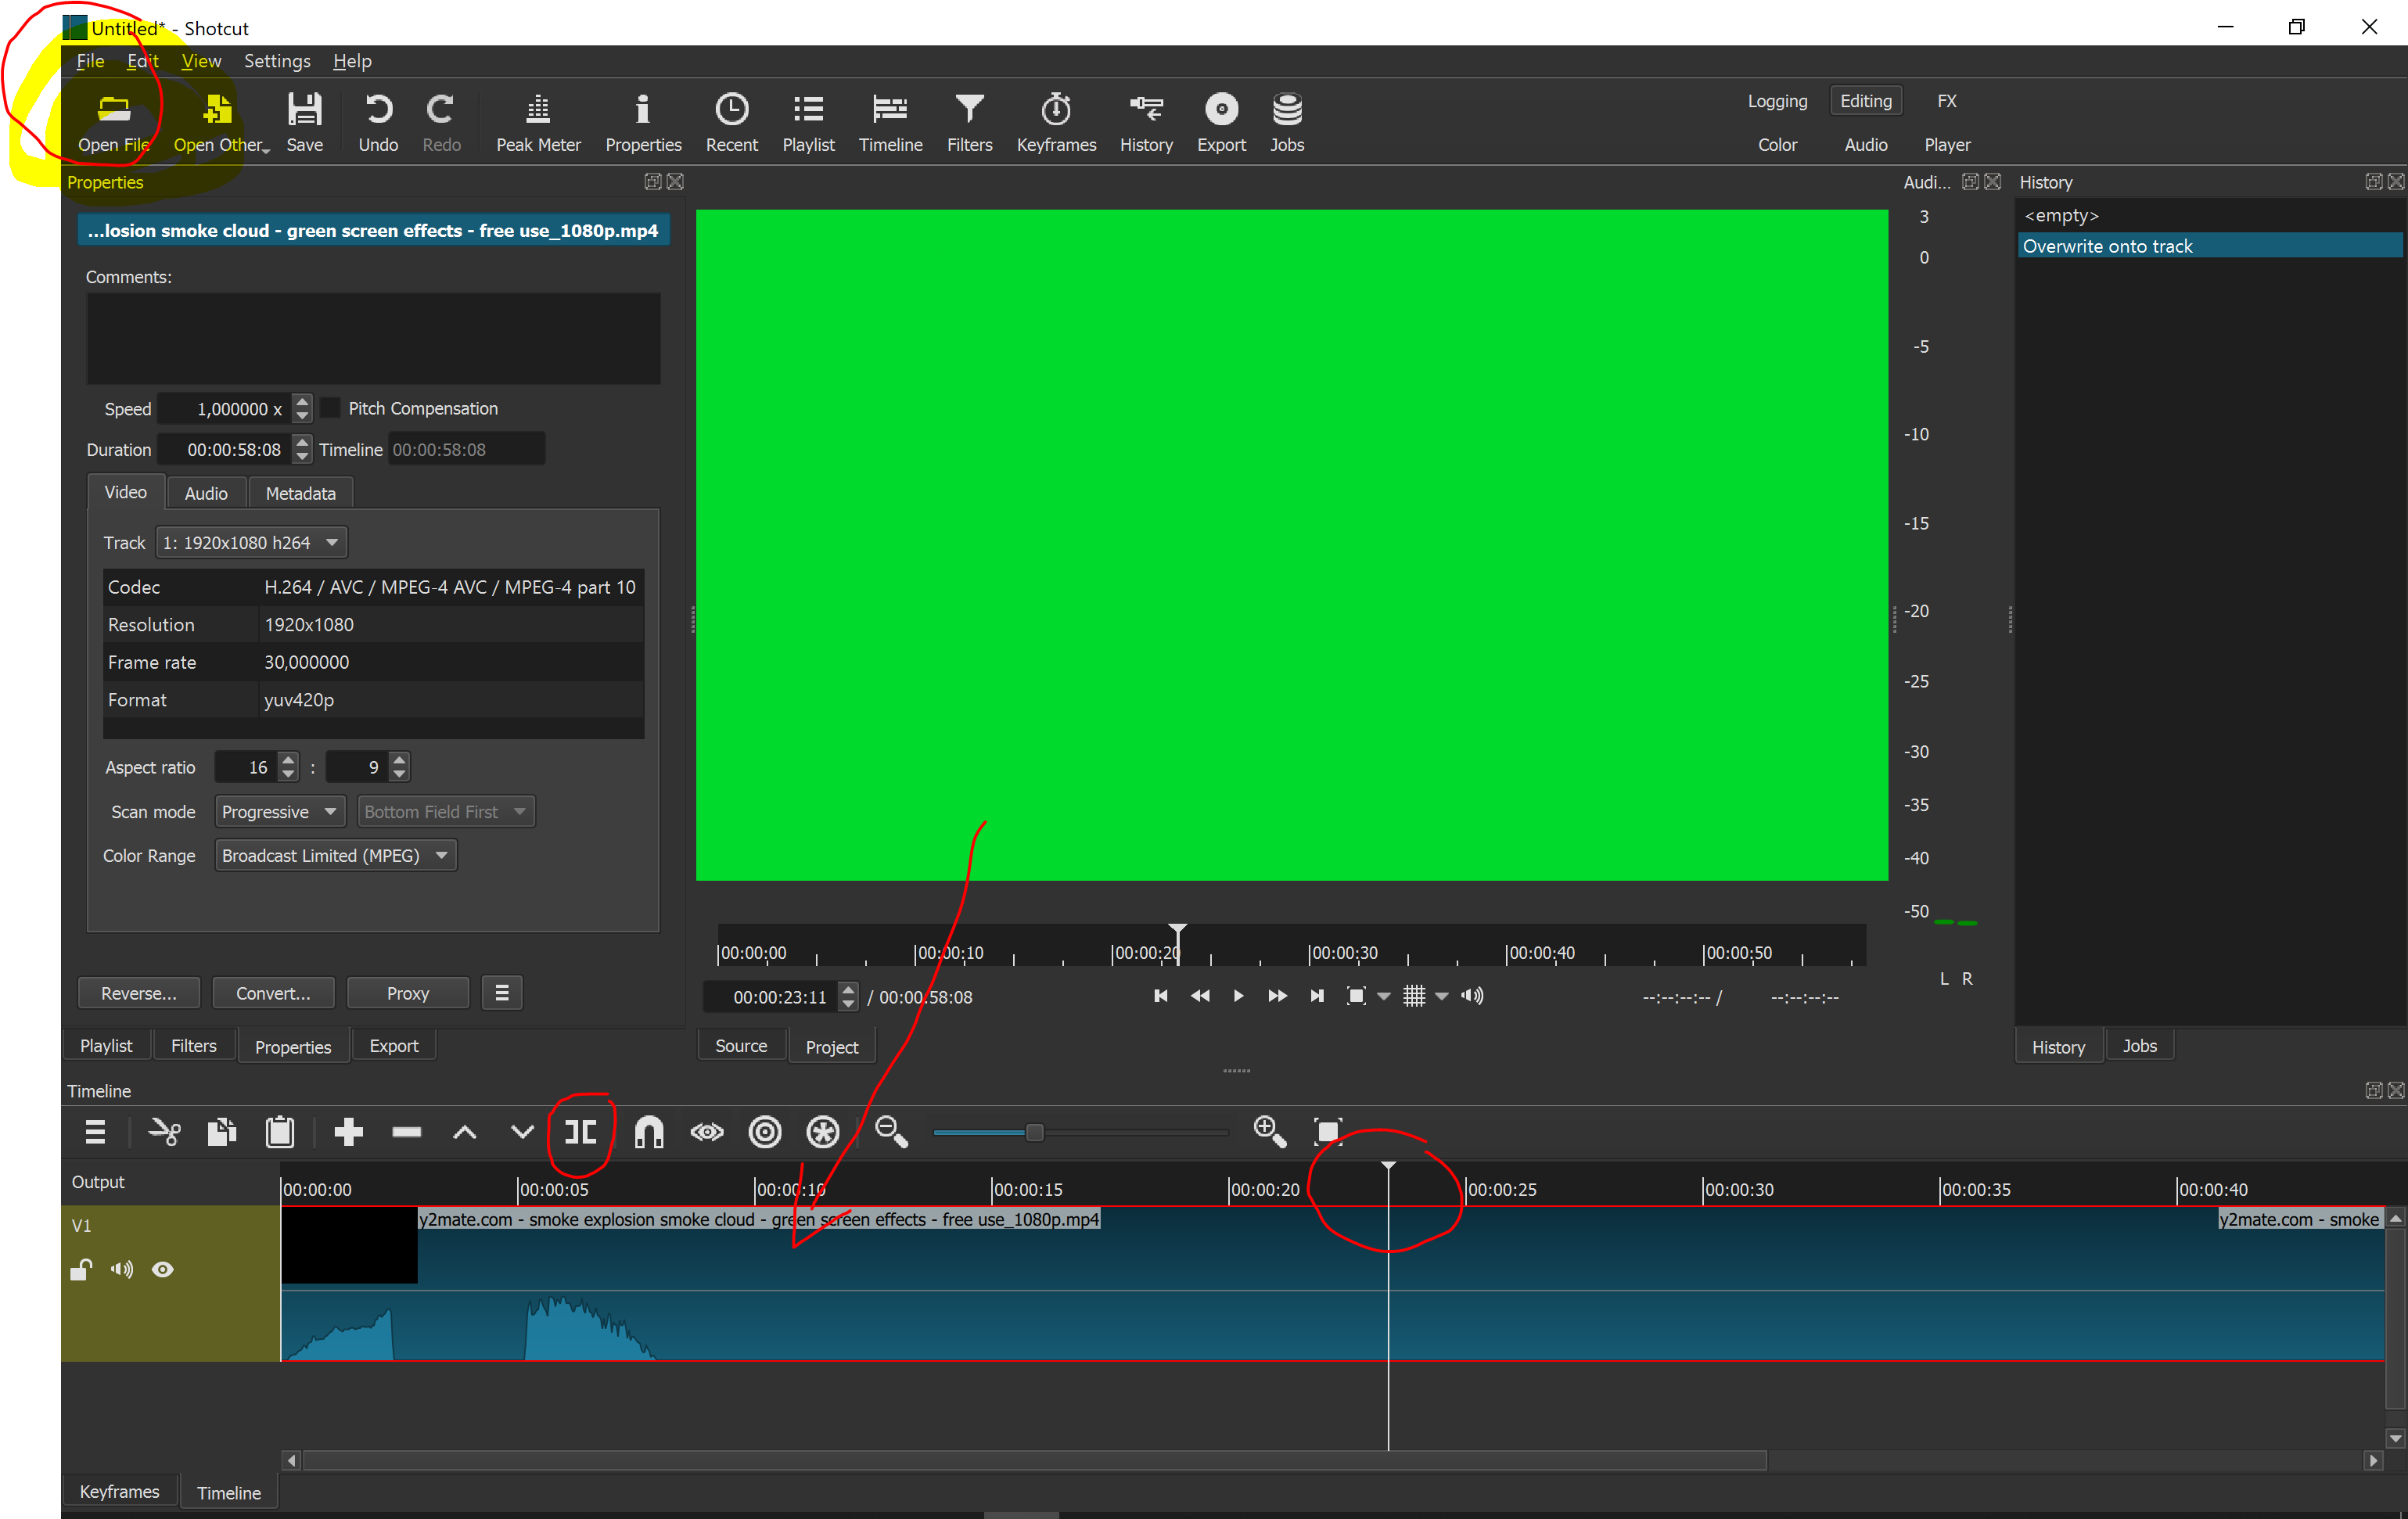
- Right-click on the left segment in the timeline and hit "remove"
- Play until the end of the segment you want to keep and split again. Right click on the right segment this time and remove again.
- Export the remaining video in "H.264 High Profile" format.
4. Install OBS and the OBS Virtual Cam Plugin
Download and install OBS, it should be straightforward. Same goes for the OBS Virtual Cam Plugin. Note that the installer is on Github (follow the "Go to download" link or visit the repo under "View the source code").
If everything worked well, you should see a menu point "Virtual Cam" under the "Tools" Menu.
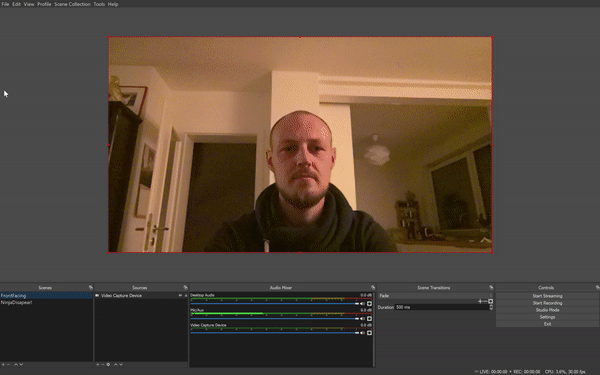
5. Setup OBS
OBS is a production software, so the smaller version of this:

OBS enables you to create "scene", e.g. different programs you can switch from. This is what we are going to use. On the bottom left of the screenshot below, you can see I created two Scenes
- SURFACE-FRONT-NORMAL: the front camera of my Surface computer
- SMOKE-BOMB: the same front camera + smoke overlay
Create both scenes and add in each a source "Video capture device". In the first one add a "new source". In the second one, add "existing source". In each scene, resize the window so that the image fills the black screen.
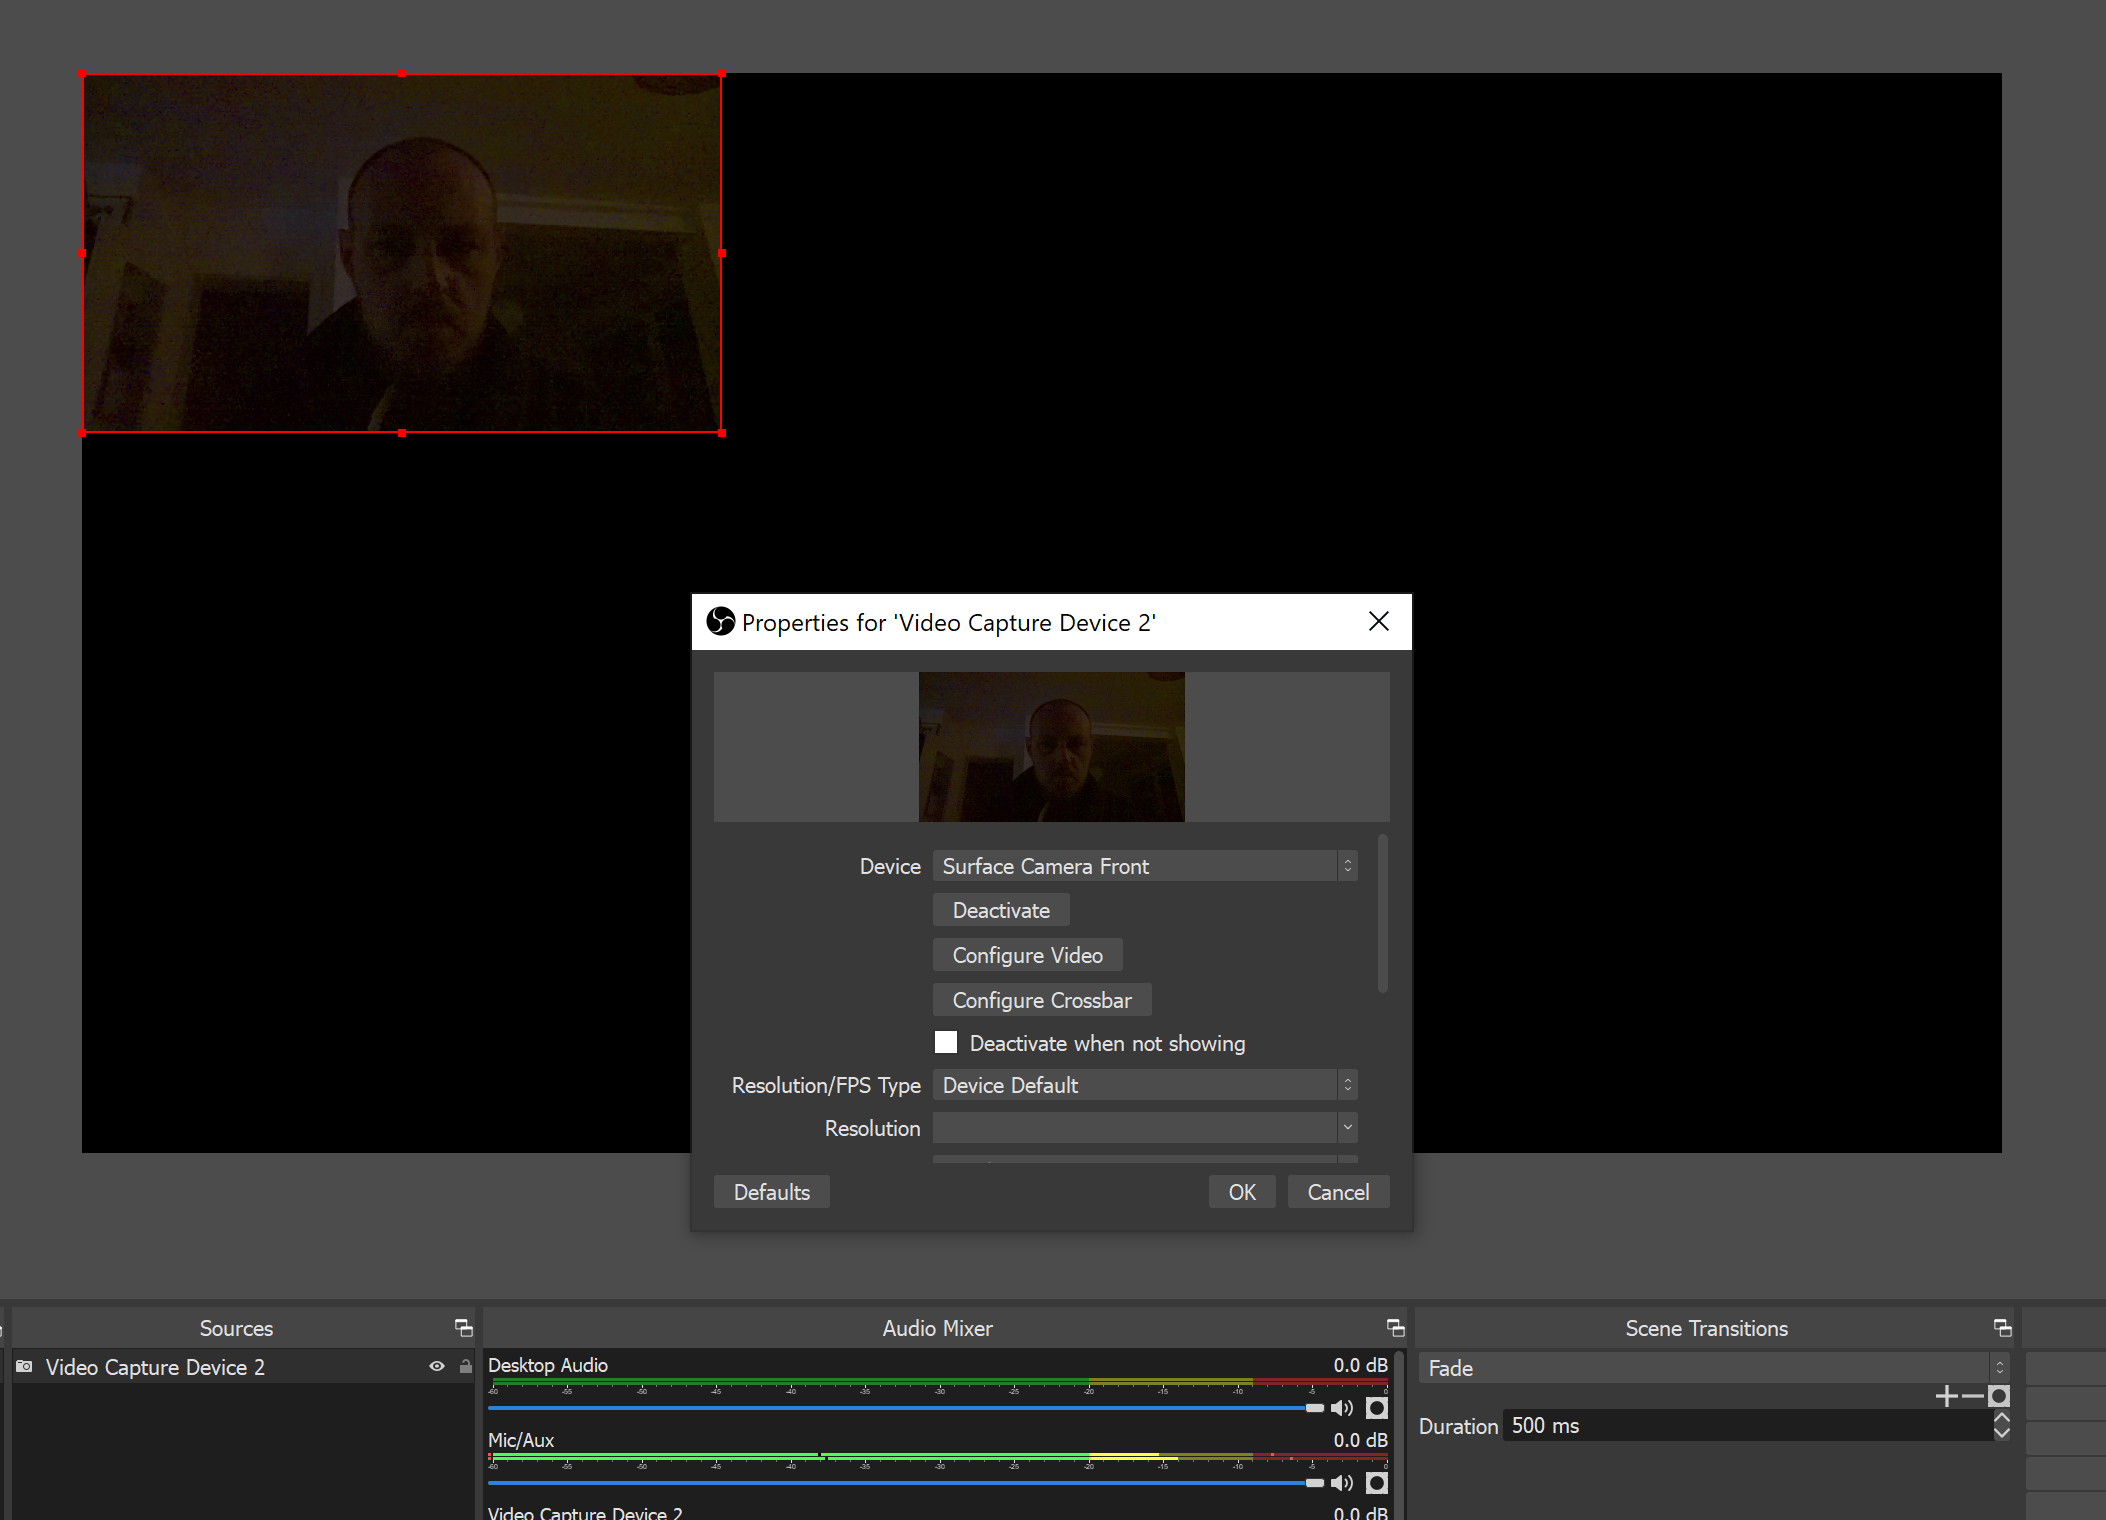
In the smoke bomb scene, add a "Media source" and point it to the video file you created previously. Similar to the webcam, resize the smoke screen to fit your liking.
Warning: placing the smoke in the right place is more than a little bit tricky. You will probably have to try a few times. By holding the "Alt" key of your keyboard and dragging the little squares, you can crop the image. Then resize the red-green window so that it fills the screen as intended. Alternatively, you could search for a software to crop the input video and use it as is.

Right-click on the video source and click "Filter", then the "+" sign in "Effect Filters" and add a "Chroma Key" filter with the default parameters, this will render the green color transparent. And finally, make sure that the smoke source is above the webcam in the source list, otherwise, the smoke will appear behind the webcam feed, and not in front of it.
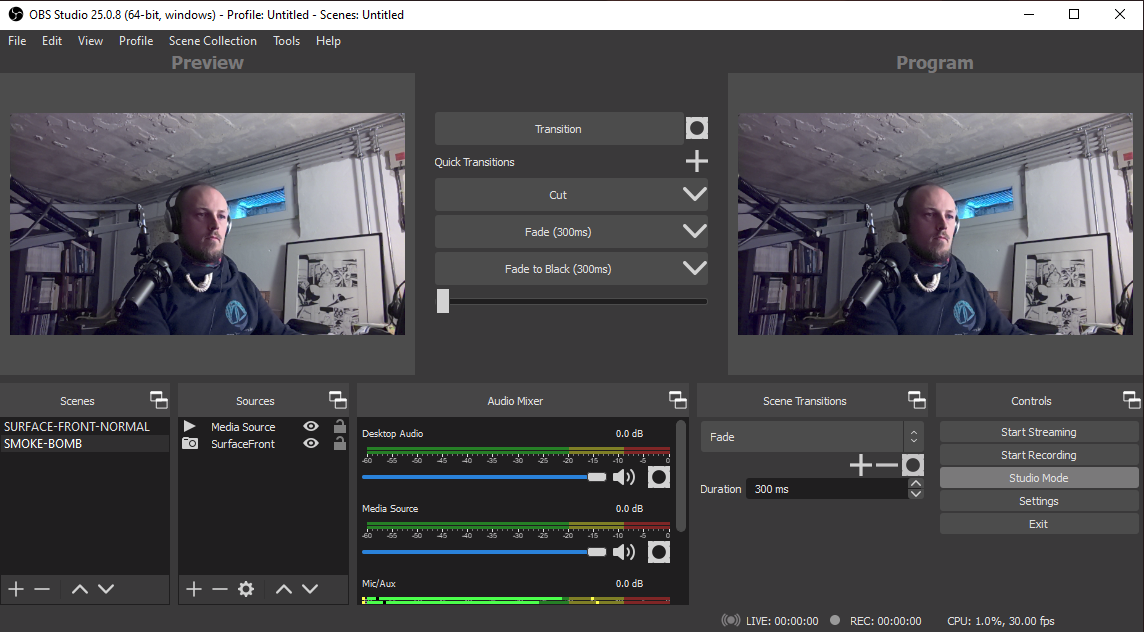
6. Play with it
In OSB, hit Tools > Virtual Cam and Start (or chose the Autostart option).
Back on the main UI, click on Studio Mode on the bottom right corner of the screen. In Studio Mode, whenever you select a scene, it is automatically what the Virtual Cam will stream. If you don't select Studio Mode, you have to select a scene and click Transition to activate it. I personally find the Studio Mode better.
Finally, you need to train your ninja move of dropping a bomb, and leaving the screen at the right moment.
7. Use in a MS-Teams
If everything went well with the OBS Plugin, you should be able to pick a new camera input in MS Teams or Zoom called "OBS-Camera".
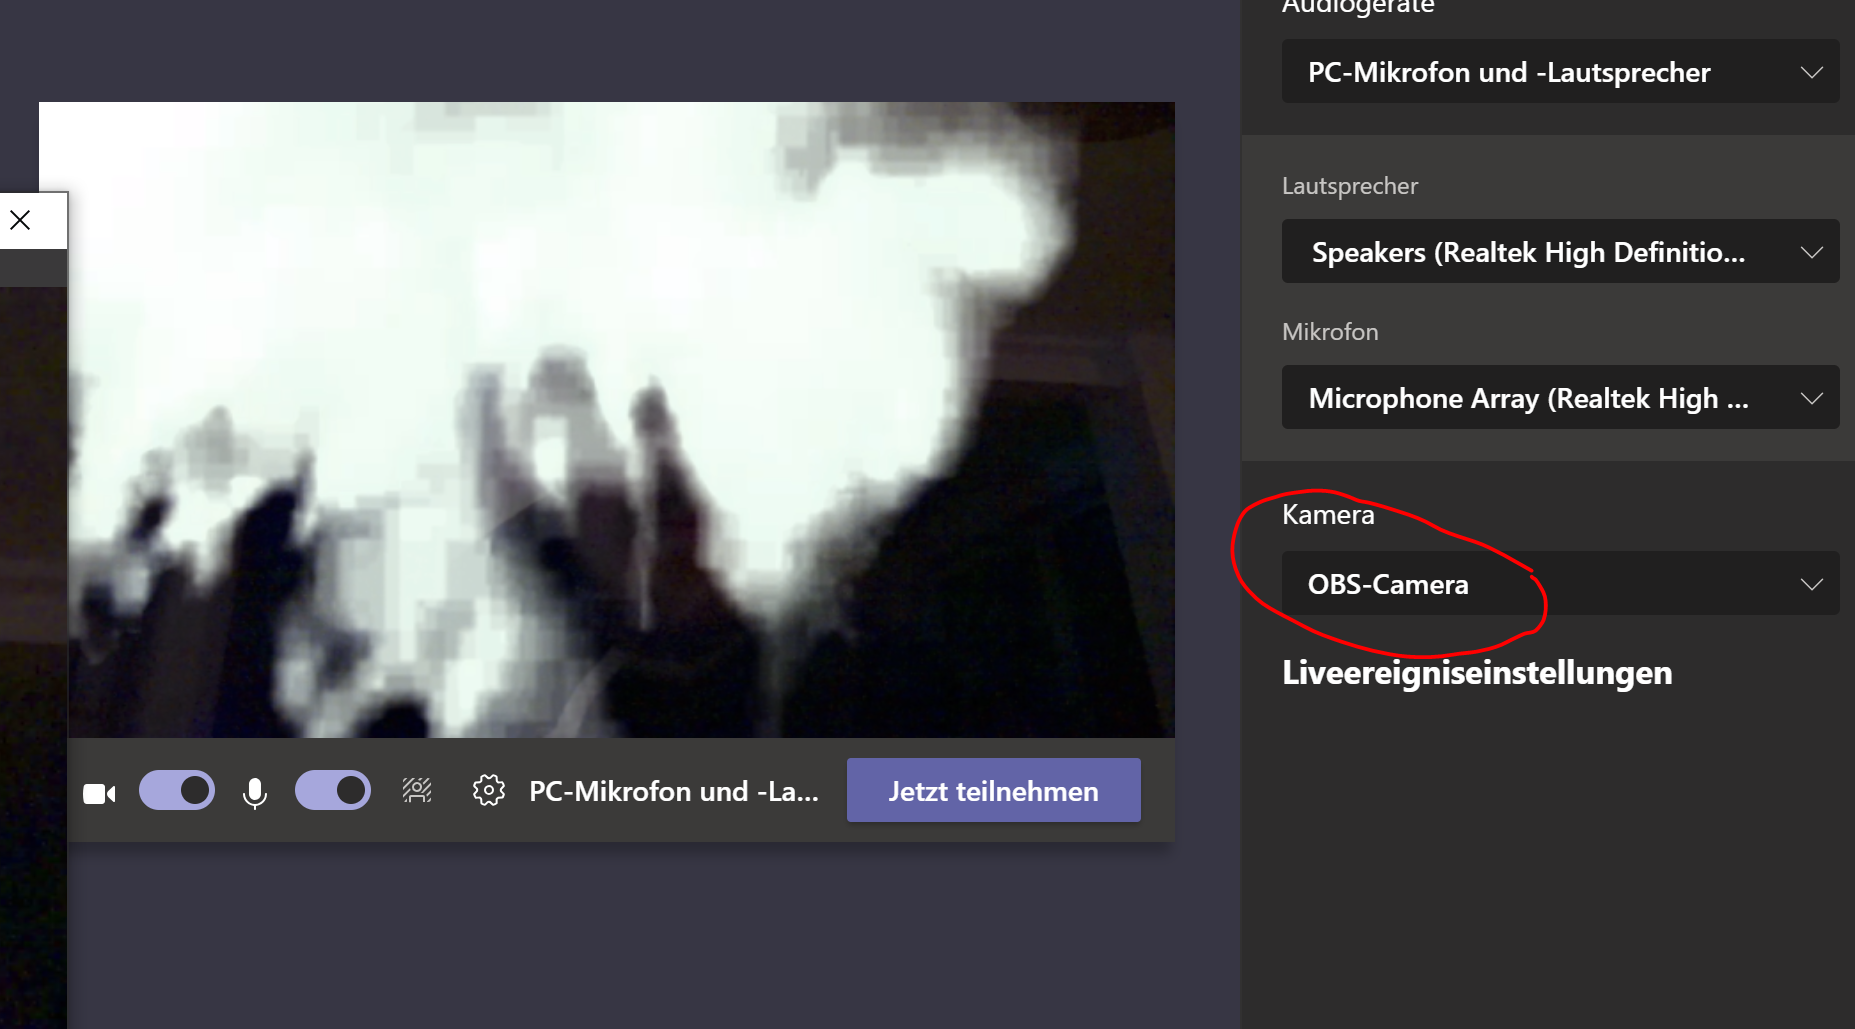
Enter your meeting as always, using the "OBS-Camera". At any time, you can switch the scene in OBS and disappear in style! I hope you have a good laugh with your colleagues! Let me know how it went.
Photo by Jens Johnsson on Unsplash

